
Using the fortigate firewall REST API
fortigate 방화벽 REST API 사용
사내에서 사용중인 fortigate 방화벽 REST API 를 이용할 이유가 생겨 어떻게 활용이 가능한지 사용법은 어떠한지 확인해 보았습니다.
우선 가장 힘들었던 부분은 관련 레퍼런스 자료가 너무 없거나 불친절한 것이었습니다. GUI 의 url 을 직접 대칭 해 보는 무식한 방법으로 몇 가지 url 을 발견하였고, 외국 블로그들에서도 몇 가지 참조가 되었습니다.
또한 fortigate 방화벽의 API 는 url 패턴도 일관성이 없는 듯 합니다. 예를들어 cmdb, monitor 구분이나 /api/v2/cmdb/user/local 처럼 깔끔하게 떨어지는 url 이 있는가 하면 /api/v2/cmdb/vpn.ssl처럼 . 으로 구분되어 있는 형식입니다.
공식 페이지에 있는 인증 방법도 저만 그런지 모르겠지만 실행이 되지 않았습니다.
우선 제가 사용한 방법은 위 링크에 있는 방법이 아닌 API 키를 이용한 방법입니다.
API 키 생성
GUI 를 이용하여 생성하는 방법
1. GUI 콘솔에서 Rest API 프로필을 생성합니다. 아래와 같이 원하시는 대로 None, Read Only, Read-Write 를 선택해 주시면 됩니다.

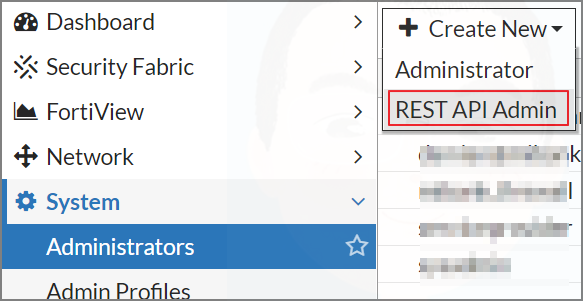
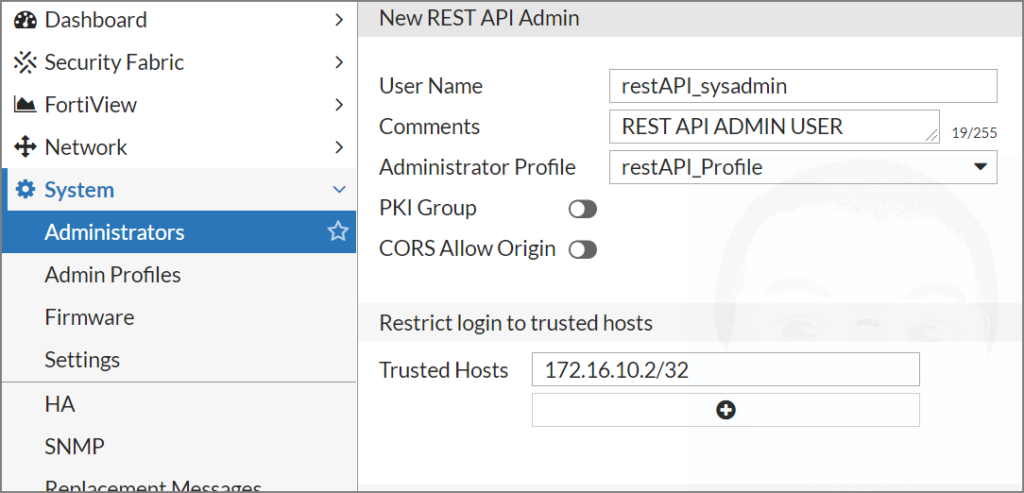
2. 아래 이미지와 같이 Admin 사용자 추가에서 REST API Admin 을 추가 해 줍니다. Trusted hosts 에는 REST API 를 사용할 서버나 서버 대역을 추가해 줍니다.
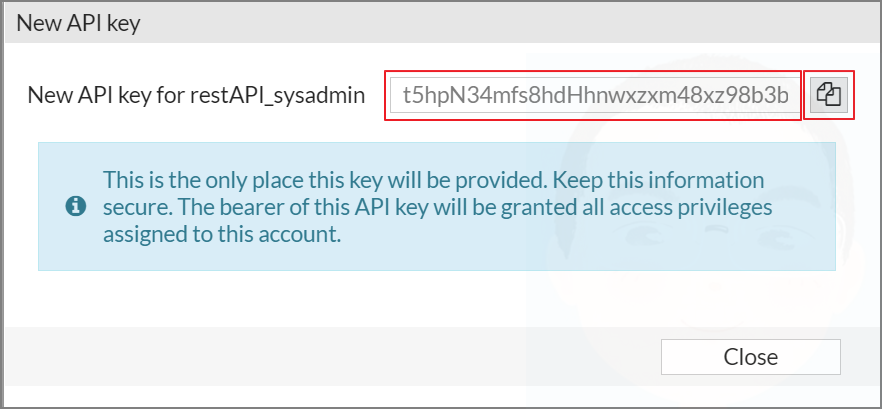
3. OK 를 클릭하면 이미지와 같이 API 키가 생성됩니다. 생성된 키는 다시 볼 수 없기 때문에 복사하여 안전한 곳에 기록해 둡니다. 만약 키를 잃어버리셨다면 다시 생성이 가능하지만 당연히 키가 변경됩니다. 생성된 키는 REST API 인증에서 쓰이기 때문에 매우 중요합니다.
CLI 를 이용하여 생성하는 방법
REST API 키는 cli 를 이용한 추가도 가능합니다. cli 가 익숙하신 분들은 해당 방법을 이용하시면 됩니다.
1. REST API Admin 을 생성합니다.
config system api-user
    edit "restAPI_sysadmin"
        set accprofile "restAPI_Profile"
        set comments "REST API ADMIN USER"
        config trusthost
            edit 1
                set ipv4-trusthost 172.16.10.2 255.255.255.255
            next
        end
    next
end
2. excute 명령어로 API Key 를 생성합니다.
execute api-user generate-key restAPI_sysadmin
    New API key: j74exGHhr9p4u81qgfHNH40p48mt1g
아래는 REST API 의 가장 기본이 되는 HTTP 메서드 입니다. 흔히 말하는 CRUD 를 의미하는 이 메서드들은 fortigate 방화벽 REST API 에서도 동일합니다.
POST: 추가
GET: 읽기
PUT: 수정
DELETE: 삭제
fortigate 방화벽 REST API 의 몇 가지 예제를 만들어 봤습니다. IP 및 PORT 에는 fortigate 방화벽의 주소를 넣으면 되고 {rest_api_key} 안에는 생성된 API Key 를 넣어 주시면 됩니다.
잘 보시면 HTTP 메서드가 특정 행위에 따라 다른 패턴을 가진다는 것을 알 수 있습니다.
fortigate 방화벽 REST API 예제
유저 목록 가져오기
curl -k -X GET \
    https://{IP:PORT}/api/v2/cmdb/user/local/ \
    --header 'Authorization: Bearer {rest_api_key}' \
    --header 'Accept: application/json' \
    --header 'cache-control: no-cache'
실행 예제
curl -k -X GET \
    https://172.16.100.1:9443/api/v2/cmdb/user/local/ \
    --header 'Authorization: Bearer j74exGHhr9p4u81qgfHNH40p48mt1g' \
    --header 'Accept: application/json' \
    --header 'cache-control: no-cache'
특정 유저 가져오기
curl -k -X GET \
    https://{IP:PORT}/api/v2/cmdb/user/local/{유저이름}/ \
    --header 'Authorization: Bearer {rest_api_key}' \
    --header 'Accept: application/json' \
    --header 'cache-control: no-cache'
실행 예제
curl -k -X GET \
    https://172.16.100.1:9443/api/v2/cmdb/user/local/fallboyz/ \
    --header 'Authorization: Bearer j74exGHhr9p4u81qgfHNH40p48mt1g' \
    --header 'Accept: application/json' \
    --header 'cache-control: no-cache'
특정 사용자의 비밀번호 변경
curl -k -X PUT \
    https://{IP:PORT}/api/v2/cmdb/user/local/{유저이름}/ \
    --header 'Authorization: Bearer {rest_api_key}' \
    --header 'Accept: application/json' \
    --header 'cache-control: no-cache' \
    --data "{
            \"passwd\": \"{비밀번호}\"
    }"
실행 예제
curl -k -X PUT \
    https://172.16.100.1:9443/api/v2/cmdb/user/local/fallboyz/ \
    --header 'Authorization: Bearer j74exGHhr9p4u81qgfHNH40p48mt1g' \
    --header 'Accept: application/json' \
    --header 'cache-control: no-cache' \
    --data "{
            \"passwd\": \"q1w2e3r4\"
    }"
유저 생성
curl -k -X POST \
    https://{IP:PORT}/api/v2/cmdb/user/local/ \
    --header 'Authorization: Bearer {rest_api_key}' \
    --header 'Accept: application/json' \
    --header 'cache-control: no-cache' \
    --data "{
            \"name\": \"{유저이름}\",
            \"status\": \"enable\",
            \"type\": \"password\",
            \"two-factor\": \"email\",
            \"email-to\": \"{메일주소}\",
            \"sms-server\": \"fortiguard\",
            \"auth-concurrent-override\": \"disable\",
            \"passwd\": \"{비밀번호}\"
    }"
실행 예제
curl -k -X POST \
    https://172.16.100.1:9443/api/v2/cmdb/user/local/ \
    --header 'Authorization: Bearer j74exGHhr9p4u81qgfHNH40p48mt1g' \
    --header 'Accept: application/json' \
    --header 'cache-control: no-cache' \
    --data "{
            \"name\": \"hallsholicker\",
            \"status\": \"enable\",
            \"type\": \"password\",
            \"two-factor\": \"email\",
            \"email-to\": \"hallsholicker@umount.net\",
            \"sms-server\": \"fortiguard\",
            \"auth-concurrent-override\": \"disable\",
            \"passwd\": \"passw0rd\"
    }"
특정 유저 삭제
curl -k -X DELETE \
    https://{IP:PORT}/api/v2/cmdb/user/local/{유저이름}/ \
    --header 'Authorization: Bearer {rest_api_key}' \
    --header 'Accept: application/json' \
    --header 'cache-control: no-cache'
실행 예제
curl -k -X DELETE \
    https://172.16.100.1:9443/api/v2/cmdb/user/local/hallsholicker/ \
    --header 'Authorization: Bearer j74exGHhr9p4u81qgfHNH40p48mt1g' \
    --header 'Accept: application/json' \
    --header 'cache-control: no-cache'
방화벽 전체 설정 백업
curl -k -s -X GET -o {backup_name}.conf \
    https://{IP:PORT}/api/v2/monitor/system/config/backup/?scope=global \
    --header 'Authorization: Bearer {rest_api_key}' \
    --header 'cache-control: no-cache'
실행 예제
curl -k -s -X GET -o 20201216_fortigate_full_configuration_backup.conf \
    https://172.16.100.1:9443/api/v2/monitor/system/config/backup/?scope=global \
    --header 'Authorization: Bearer 1mH1p5jm6hz4gxrrQn6c7nQ66qs5yf' \
    --header 'cache-control: no-cache'
아래는 REST API url 은 제가 찾은 fortigate 방화벽의 REST API 목록 중 자주 사용할 만한 것들만 일부 나열한 것입니다. 이 외에도 제가 찾지 못한 url 들이 더 많이 있을 것 같긴 합니다.
위의 예제들을 참고하여 응용하면 누구나 쉽게 fortigate 방화벽 REST API 를 사용하실 수 있습니다.
/api/v2/cmdb/antivirus/profile/
/api/v2/cmdb/firewall/address/
/api/v2/cmdb/firewall/address/{address_name}/
/api/v2/cmdb/firewall/addrgrp/
/api/v2/cmdb/firewall/addrgrp/{address_group_name}/
/api/v2/cmdb/firewall/policy/
/api/v2/cmdb/firewall/policy/{policy_id}/
/api/v2/cmdb/system/global/
/api/v2/cmdb/system/interface/
/api/v2/cmdb/system/interface/{interface_name}/
/api/v2/cmdb/user/local/
/api/v2/cmdb/user/local/{user_name}/
/api/v2/cmdb/user/group/
/api/v2/cmdb/user/group/{group_name}/
/api/v2/cmdb/vpn.ssl/settings/
/api/v2/monitor/firewall/policy/
/api/v2/monitor/license/status/
/api/v2/monitor/log/device/state/
/api/v2/monitor/router/ipv4/
/api/v2/monitor/system/config/backup/?scope=global
/api/v2/monitor/system/firmware/
/api/v2/monitor/system/interface/
/api/v2/monitor/system/status/
/api/v2/monitor/vpn/ssl/
저는 이 API 들을 이용하여 어떤 것들은 Zabbix 를 통해 모니터링 하거나 AWX(Ansible) 을 적용하거나 간단한 것들은 직접 웹페이지 개발에 도전해 볼 예정입니다.
관련 내용들도 완료되는 대로 추가 포스팅을 해보도록 하겠습니다.
– 실행 예제에 오타가 있어 수정하였습니다. (2021-01-03)
applicatoin -> application
좋은정보 감사합니다.
근데 테스트간 실행예제대로 실행을 해보았는데 정상적으로 구동이안되는거 같아요.
제가 뭘 잘못하고 있는걸까요
글쎄요, 일단 예제에 오타가 있어 수정을 하긴 했는데, 그 부분하고 관계없이 실행에는 문제가 없었습니다. 오류 상황이나 오류 메세지를 알아야 어떤 문제인지 알 수 있을 것 같습니다
선생님 혹시 방화벽 커밋하는 API는 없었나요? 흑흑흑
아무리 찾아도 안 나와서 여쭤봅니다
너무 늦게 확인했습니다. 방화벽 커밋이라는게 어떤 작업을 말하시는건가요? 정책 설정 수정을 말하시는거라면 /api/v2/cmdb/firewall/policy/ 을 사용하시면 됩니다
좋은 정보 감사합니다. 혹시 GET으론 값을 정상적으로 얻어오는데, POST로는 Status가 Error가 발생(ex:user 생성)합니다. 이외에 추가적으로 설정이 필요한가요?
권한 설정에 문제만 없으면 딱히 추가적으로 설정할 필요는 없습니다. Status 코드가 어떻게 나오는지를 보고 판단이 필요할 것 같아요