
Souce Install Bareos 20.0.0 on CentOS 7
오픈소스 Backup 솔루션 Bareos 설치 가이드
Bareos 설치에 앞서..
이번에는 오픈소스 백업 솔루션인 Bareos 설치 가이드를 작성해 보도록 하겠습니다.
Bareos 의 간단한 소개는 Backup 솔루션 Bareos 소개 포스팅에서 확인하실 수 있습니다. Bareos 소개를 작년 9월(2020년 9월)에 진행하였는데 밀린 업무가 많고 바쁘다는 핑계로 설치 가이드는 좀 늦게 작성하게 되었습니다.
Bareos 는 오픈소스 이지만 패키지의 지속적인 패치버전과 지원은 유료 라이센스를 구매한 사람에게만 지원됩니다. 말이 조금 어려울 수 있는데 쉽게 설명드리면 오픈소스로 제공되는 리포지토리인 https://download.bareos.org/bareos/ 에서는 최신 버전의 첫번째 릴리즈만 패키지로 공개가 됩니다. 라이센스 사용자에게 제공되는 리포지토리인 https://download.bareos.com/bareos/ 에서는 지속적인 패치 버전의 릴리즈 패키지가 공개됩니다.
때문에 오픈소스 사용자가 최신 버전을 사용하기 위해선 Github 에서 소스를 받아서 컴파일 설치를 사용해야 합니다. 또한 소스 컴파일에 대한 자세한 가이드도 제대로 공개되어 있지 않습니다. 저는 테스트 당시 최신버전인 19.2.8 사용을 위해 소스 컴파일 방식을 이용하여 설치하는 방법을 테스트하게 되었고, 테스트 하던 중 Bareos 20.0.0 버전이 나오게 되어 그냥 쭉 소스 컴파일 설치로 진행하게 되었습니다.
Bareos 설치는 데이터베이스, 바레오스, 바레오스 웹 UI 이렇게 3개의 순서대로 진행됩니다. 데이터베이스로는 Sqlite3, Mysql(MariaDB), PostgreSQL 이렇게 3개가 지원되었지만 Bareos 19.0.0 버전부터는 Mysql(MariaDB) 지원되지 않습니다. 또한 Sqlite3 은 프로덕션 환경에서는 사용하지 않으며, Bareos 20.0.0 버전부터는 지원이 되지 않기 때문에 실질적으로는 PostgreSQL 만 지원된다고 보시면 됩니다. 때문에 하위 버전을 사용하더라도 추 후 업그레이드를 위해 PostgreSQL 을 사용하는 것이 옳은 선택입니다.
참고로 본 가이드는 Bareos 소스 설치에 대한 기본적인 방법에 대해서 다루며, 편의를 위해 Bareos 를 제외한 주요 어플리케이션들은 모두 패키지 설치를 이용합니다. 또한 각 어플리케이션들의 주요 보안 설정이나 세부적인 설정 사항들은 다루지 않도록 하겠습니다.
1. PostgreSQL 설치
패키지 설치
yum install -y openssl-devel
yum install -y centos-release-scl-rh
yum install -y llvm-toolset-7-clang
yum install -y https://download.postgresql.org/pub/repos/yum/reporpms/EL-7-x86_64/pgdg-redhat-repo-latest.noarch.rpm
yum install -y postgresql13-server postgresql13-devel
postgresql 의 data 디렉토리를 변경하고자 할 때에는 systemd 파일의 Environment=PGDATA= 경로를 수정해줍니다. 저는 편리함을 위해 Alias 도 추가 하였으며, 이 설정은 딱히 수정하지 않아도 동작하는데 문제가 없기 때문에 그냥 넘어가셔도 됩니다.
: vi /usr/lib/systemd/system/postgresql-13.service
... 생략
# Note: avoid inserting whitespace in these Environment= lines, or you may
# break postgresql-setup.

# Location of database directory
Environment=PGDATA=/data/pgdata

... 생략
[Install]
WantedBy=multi-user.target
Alias=postgresql.service
저는 systemd 파일에서 data 디렉토리를 변경하였기 때문에 data 디렉토리를 생성하고 권한을 수정 해 주었습니다.
mkdir -p /data/pgdata
chown postgres.postgres /data/pgdata
이제 아래 명령어로 데이터베이스 초기화를 진행 합니다.
/usr/pgsql-13/bin/postgresql-13-setup initdb
systemd 파일을 등록 하고 postgresql 서버를 실행합니다. Alias 를 등록해 주었기 때문에 등록 이후에는 [-13] 을 생략 할 수 있습니다.
systemctl enable postgresql-13
systemctl start postgresql
2. Bareos 설치
가이드가 길고 복잡해 보일 수 있습니다. 그만큼 Bareos 소스 설치가 매우 까다로운 편입니다.
의존성 패키지
필수 의존성 패키지 설치
yum install -y epel-release readline-devel jansson-devel
선택적 의존성 패키지 설치
선택적이기 때문에 하지 않으셔도 상관 없습니다. 자신에게 필요한 패키지만 골라서 설치해 주시면 됩니다. VMWare 플러그인을 사용하실 분은 VDDK 패키지를 설치해야 하는 듯 합니다. 저는 VMWare 를 사욯하지 않기 때문에 설치하지 않았습니다. 또한 백엔드 저장소로 glusterfs 를 사용하시려는 분은 절대 libtirpc-devel 패키지를 설치하시면 안됩니다. 해당 이슈는 릴리즈 노트를 확인 해 주시기 바랍니다.
Bareos 는 독특하게도 설치할때 유닛 테스트 등, 각종 테스트를 진행 합니다. gtest 나 gmock, python 의 각종 패키지들, php 등을 요구하는데 대부분이 테스트를 위한 것이기 때문에 꼭 설치를 하실 필요는 없습니다. 상당히 짜증나는 부분이기도 합니다.
일단 제가 설치한 패키지들을 쭉 나열하면 아래와 같습니다.
yum install libcap-devel pam-devel lzo-devel gtest-devel mtx xtrabackup s3cmd pamtester python2-devel pam_wrapper tcp_wrappers-devel
Droplet 패키지는 Bareos 에서 백엔드 저장소로 AWS S3 사용하기 위해 필요한 패키지 입니다. Bareos 19.x 버전은 bareos repo 에 해당 패키지가 들어있기 때문에 bareos.repo 를 추가 후 yum install libdroplet-devel 하면 되지만 20.x.x repo 에는 포함되어 있지 않습니다. 다음 버전에서는 다시 추가될지 모르겠지만 지금은 없기 때문에 github 에서 소스를 받아서 직접 컴파일을 진행 하였습니다.
의존성 패키지 설치
yum install -y automake autoconf libtool check check-devel libxml2-devel json-c-devel libattr-devel
Droplet 소스 컴파일 설치
cd /usr/local/src/
git clone https://github.com/scality/Droplet.git
cd Droplet
./autogen.sh
make && make install
minio 는 오브젝트 스토리지를 손쉽게 구현해주는 go 로 작성된 오픈소스로써 AWS S3 와 거의 완벽하게 호환되며 그 모양도 아주 흡사합니다. Bareos 에서 이게 왜 필요한지는 잘 모르겟으나 일단 설치 방법을 작성해 봅니다.
설치가 매우 간편하며, 도커를 이용한 설치 방법도 있지만 단일 바이너리 파일로 되어 있기 때문에 그냥 바이너리를 다운로드 하면 됩니다. 설치만 해놓고 구동은 하지 않아도 Bareos 를 컴파일 하는 대는 문제가 없습니다.
자세한 정보는 https://docs.min.io/docs/ 페이지를 확인해 주시기 바랍니다.
wget https://dl.min.io/server/minio/release/darwin-amd64/minio
chmod +x minio
mv minio /usr/bin/
백엔드 저장소로 ceph 를 사용한다면 ceph 패키지를 설치하셔야 합니다.
yum install -y centos-release-ceph-nautilus
yum install -y libcephfs-devel
yum install -y libradosstriper-devel
백엔드 저장소로 glusterfs 를 사용한다면 glusterfs 패키지를 설치하셔야 합니다. 저는 운영중인 서비스가 GlusterFS 7.9 버전을 사용중이기 때문에 7 버전으로 설치하였습니다.
참고: CentOS 7 기준으로 Bareos 소스 컴파일이 아닌, 패키지 설치를 이용하시는 분들 중 glusterfs 를 백엔드 저장소로 사용하시려는 분들은 CentOS base 리포지토리에 들어있는 glusterfs 6.0.x 버전으로 설치하시길 권장 드립니다.
yum install -y centos-release-gluster7
yum install -y glusterfs-devel glusterfs-api-devel glusterfs-fuse
위에서 언급했던 테스트를 위해 필요한 패키지들은 아래와 같이 설치해 줍니다. 만약에 psycopg2 설치시 에러가 발생한다면 PostgreSQL 의 바이너리 경로를 export 해주면 됩니다.
export PATH=$PATH:/usr/pgsql-13/bin/

yum install python-pip
yum install openldap-devel

pip install python-ldap
pip install apache-libcloud
pip install python-dateutil
pip install selenium

pip3 install apache-libcloud
pip3 install python-dateutil
pip3 install fastapi
pip3 install uvicorn
pip3 install selenium

pip install psycopg2
pip3 install psycopg2
아래는 크롬 드라이브 설치입니다. 역시 테스트를 위해 필요한 패키지 입니다.
wget https://chromedriver.storage.googleapis.com/89.0.4389.23/chromedriver_linux64.zip
unzip chromedriver_linux64.zip
mv chromedriver /usr/bin/
rm -f chromedriver_linux64.zip
PHP 패키지도 테스트시 필요한데 이미 PostgreSQL 을 설치할때 centos-release-scl-rh 리포지토리를 설치하였으면 아래 커맨드로 설치가 가능합니다.
yum install -y rh-php72-php-fpm rh-php72-php-cli rh-php72-php-pgsql rh-php72-php-xml rh-php72-php-mbstring rh-php72-php-intl rh-php72-php-gd nginx
설치가 되었다면 Bareos 컴파일 시 php 파일의 경로를 찾을 수 있도록 export 해 주어야 합니다.
export PATH=$PATH:/opt/rh/rh-php72/root/usr/bin/
Bareos 설치
이제 본격적으로 Bareos 를 설치하기 위해 소스를 가지고 옵니다. Bareos Github 리포지토리를 그냥 클로닝 하게 되면 스테이블 버전이 아닌 테스트 버전으로 가져오기 때문에 반드시 아래와 같이 tag 네임을 지정해서 가져오셔야 합니다.
cd /usr/local/src/
git clone -b Release/20.0.0 --single-branch https://github.com/bareos/bareos
cd /usr/local/src/bareos/
mkdir -p /usr/local/src/bareos/build
cd /usr/local/src/bareos/build/
Bareos 는 cmake 3.12.x 이상 버전으로 컴파일 하셔야 합니다. epel release 에 있는 cmake3 를 yum install cmake3 를 이용하여 패키지 설치 하셨다면 cmake3 .. -Dpostgresql=yes 이용 시 PostgreSQL 관련 오류가 발생합니다. 그럴 땐 아래와 같이 사용해 주시면 됩니다.
cmake3 .. -Dpostgresql=/usr/pgsql-13/bin/pg_config
하지만 이렇게 해도 다른 문제들이 발생할 수 있습니다. 해결하기에는 손이 너무 많이 가기 때문에 그냥 cmake3 패키지를 소스 컴파일 설치를 해주는 것이 속 편합니다. 저는 3.19.3 버전을 설치하였습니다.
cd /usr/local/src/
wget https://github.com/Kitware/CMake/releases/download/v3.19.3/cmake-3.19.3.tar.gz
tar xvzf cmake-3.19.3.tar.gz
cd cmake-3.19.3
./bootstrap
gmake -j$(nproc)
gmake install
cmake3 패키지를 위와 같이 소스 컴파일 설치를 다 하셨다면 아래와 같이 진행 하시면 됩니다.
rm -Rf /usr/local/src/bareos/build/*
cd /usr/local/src/bareos/build/
/usr/local/bin/cmake .. -Dpostgresql=yes
문제가 없으면 컴파일을 해줍니다.
gmake -j$(nproc)
gmake 할때 pam_wrapper 관련하여 에러가 날수가 있습니다. 어떤 패키지와 상관 관계가 있는지 귀차니즘으로 인해 확인 못했습니다만 이럴땐 pam 관련 패키지지인 pam_wrapper 과 tcp_wrappers-devel 를 삭제 한 후에 build 디렉토리 안의 내용을 지운 뒤 다시 cmake 후 gmake 하면 해결됩니다. 문제가 없으면 바로 설치를 완료해 주시면 됩니다.
gmake install
Bareos 설정
본 가이드대로 설치를 하셨다면 기본적인 디렉토리 구조는 아래와 같습니다.
로그 디렉토리: /usr/local/var/log/bareos
작업(홈) 디렉토리: /usr/local/var/lib/bareos
설정 디렉토리: /usr/local/etc/bareos
웹 홈 디렉토리: /usr/local/share/bareos-webui
해당 디렉토리를 그대로 사용해도 무방하지만 저같은 경우엔 편의를 위해 디렉토리들을 조금 수정하거나 링크를 거는 편입니다. 저는 아래와 같이 링크를 걸었습니다.
ln -s /usr/local/etc/bareos /etc/bareos
ln -s /usr/local/var/lib/bareos /var/lib/bareos
ln -s /usr/local/var/log/bareos /var/log/bareos
Bareos 사용자를 생성해 줍니다.
useradd -M -r -s /sbin/nologin -u 990 bareos
아래 디렉토리 및 파일들에 대해 새로 생성한 Bareos 사용자 계정의 권한으로 모두 수정합니다. 앞으로도 해당 디렉토리 및 파일들은 모두 bareos 권한으로 되어 있어야 합니다.
chown bareos.bareos -Rf /usr/local/var/lib/bareos
chown bareos.bareos -Rf /usr/local/var/log/bareos
chown bareos.bareos -Rf /usr/local/etc/bareos
이제 기본 데이터베이스를 삽입해 줍니다.
su postgres -c /usr/local/lib/bareos/scripts/create_bareos_database
su postgres -c /usr/local/lib/bareos/scripts/make_bareos_tables
su postgres -c /usr/local/lib/bareos/scripts/grant_bareos_privileges
systemd 파일을 복사합니다.
cp /usr/local/src/bareos/core/platforms/systemd/bareos-dir.service /usr/lib/systemd/system/bareos-dir.service
cp /usr/local/src/bareos/core/platforms/systemd/bareos-fd.service /usr/lib/systemd/system/bareos-fd.service
cp /usr/local/src/bareos/core/platforms/systemd/bareos-sd.service /usr/lib/systemd/system/bareos-sd.service
복사한 파일들을 모두 편집기로 열면 User 및 Group 의 값이 비어 있습니다. 위에서 생성한 사용자인 bareos 를 입력 후 저장합니다.
: vi /usr/lib/systemd/system/bareos-dir.service
: vi /usr/lib/systemd/system/bareos-fd.service
: vi /usr/lib/systemd/system/bareos-sd.service
... 생략
[Service]
Type=forking
User=bareos
Group=bareos
WorkingDirectory=/usr/local/var/lib/bareos
... 생략
이제 기본 설정의 마지막입니다. WEB UI 에 접속할 사용자를 생성해 주어야 합니다.
cp /etc/bareos/bareos-dir.d/console/admin.conf.example /etc/bareos/bareos-dir.d/console/admin.conf
chown bareos.bareos /etc/bareos/bareos-dir.d/console/admin.conf
편집기로 위 파일을 편집해 줍니다. Name 과 Password 과 접속할 아이디 및 비밀번호와 매칭됩니다. 원하시는대로 편집하시면 됩니다.
: vi /etc/bareos/bareos-dir.d/console/admin.conf
#
# Restricted console used by bareos-webui
#
Console {
  Name = fallboyz
  Password = "fallboyzFALLBOYZsecretSECRET!@#$%)(*&^"
  Profile = "webui-admin"


  # As php does not support TLS-PSK,
  # and the director has TLS enabled by default,
  # we need to either disable TLS or setup
  # TLS with certificates.
  #
  # For testing purposes we disable it here
  TLS Enable = No
}
이제 기본적인 설치 및 설정이 마무리 되었습니다. systemd 등록 및 실행을 해줍니다.
systemctl enable bareos-dir
systemctl enable bareos-fd
systemctl enable bareos-sd

systemctl start bareos-dir
systemctl start bareos-fd
systemctl start bareos-sd
bareos-dir 은 9101 포트, bareos-fd 는 9102 포트, bareos-sd 는 9103 포트를 사용합니다. 모두 정상적으로 올라 왔다면 성공적으로 설치가 마무리 된 것입니다.
만약 실행에 문제가 생겼을 경우 아래 명령어를 이용하여 설정 파일에 대한 디버깅이 가능합니다.
/usr/local/sbin/bareos-dir -t -d 200 -u bareos -g bareos
3. Bareos WEB UI 설치
Bareos WEB UI 는 PHP 및 Apache(HTTPD) 를 필요로 합니다. 저는 웹서버로 Apache 대신 Nginx 를 이용하도록 하겠습니다.
앞서 얘기 드렸지만 Bareos 설치가 메인이기 때문에 PHP 및 Nginx 는 yum 을 이용하여 설치를 진행하겠습니다.
또한 Bareos 20.0.0 부터는 PHP 7.x 이상 버전을 권장하기 때문에 CentOS base 리포지토리에 있는 버전이 아닌 centos-sclo-rh 리포지토리를 이용하여 설치하였습니다.
추가로 PHP 7.3 버전에서는 warning 이나 error 가 많습니다. PHP 7.2 버전을 설치하니 해당 문제들이 발생하지 않는 것을 확인하였기에 PHP 7.2 버전으로 설치하길 권장 드립니다.
이미 PostgreSQL 을 설치할때 centos-release-scl-rh 리포를 설치하였으면 아래 커맨드로 설치가 가능합니다. 당연한 얘기지만 Bareos 컴파일 시 테스트를 위해 이미 설치하셨다면 설치 부분은 넘어가셔도 됩니다.
yum install -y rh-php72-php-fpm rh-php72-php-pgsql rh-php72-php-xml rh-php72-php-mbstring rh-php72-php-intl rh-php72-php-gd nginx
Apache 가 아닌 Nginx 를 이용하기 때문에 수정사항이 몇 가지 있습니다. 우선 세션 및 캐쉬 디렉토리의 권한을 Nginx 사용자로 수정해 줍니다.
chown root.nginx -Rf /var/opt/rh/rh-php72/lib/php/*
Nginx 의 설정 파일은 아래와 똑같이 복사해서 붙여 넣으면 됩니다. 이때, 설정파일의 root 디렉토리의 경로는 앞서 Bareos 설치 때 설명 드렸던 웹 홈 디렉토리에 public 디렉토리가 추가된 경로인 /usr/local/share/bareos-webui/public 입니다.
보안 설정이나 세세한 설정들은 하지 않은 상태이기 때문에 알아서 수정해 주시면 되고 딱히 수정하지 않으셔도 동작하는데 문제는 없습니다.
vi /etc/nginx/nginx.conf
user nginx;
worker_processes auto;
error_log /var/log/nginx/error.log;
pid /run/nginx.pid;

include /usr/share/nginx/modules/*.conf;

events {
    worker_connections 1024;
}

http {
    log_format  main  '$remote_addr - $remote_user [$time_local] "$request" '
                      '$status $body_bytes_sent "$http_referer" '
                      '"$http_user_agent" "$http_x_forwarded_for"';

    access_log  /var/log/nginx/access.log  main;

    sendfile            on;
    tcp_nopush          on;
    tcp_nodelay         on;
    keepalive_timeout   65;
    types_hash_max_size 2048;

    include             /etc/nginx/mime.types;
    default_type        application/octet-stream;

    # Load modular configuration files from the /etc/nginx/conf.d directory.
    # See http://nginx.org/en/docs/ngx_core_module.html#include
    # for more information.
    include /etc/nginx/conf.d/*.conf;

    server {
        listen      80 default_server;
        listen      [::]:80 default_server;
        server_name localhost;
        root        /usr/local/share/bareos-webui/public;

        location / {
            index index.php;
            try_files $uri $uri/ /index.php?$query_string;
        }

        location ~ .php$ {
            if (!-f $document_root$fastcgi_script_name) {
                return 404;
            }

            fastcgi_param HTTP_PROXY "";

            fastcgi_pass                 127.0.0.1:9000;
            fastcgi_index                index.php;
            fastcgi_buffers              256 16k;
            fastcgi_buffer_size          128k;
            fastcgi_connect_timeout      180s;
            fastcgi_send_timeout         180s;
            fastcgi_read_timeout         180s;
            fastcgi_busy_buffers_size    256k;
            fastcgi_temp_file_write_size 256k;
            fastcgi_max_temp_file_size   0;
            fastcgi_intercept_errors     on;

            include       fastcgi_params;
            fastcgi_param SCRIPT_FILENAME $document_root$fastcgi_script_name;
            fastcgi_param APPLICATION_ENV production;
        }
    }
}
이제 php-fpm 파일을 편집기를 이용하여 user 와 group 이름을 nginx 사용자로 수정해 줍니다.
역시나 보안적인 부분이나 세세한 설정 부분들은 직접 수정해 주시면 되며, 수정하지 않아도 동작하는데 문제는 없습니다.
vi /etc/opt/rh/rh-php72/php-fpm.d/www.conf
... 생략
; Unix user/group of processes
; Note: The user is mandatory. If the group is not set, the default user's group
;       will be used.
; RPM: apache user chosen to provide access to the same directories as httpd
user = nginx
; RPM: Keep a group allowed to write in log dir.
group = nginx

; The address on which to accept FastCGI requests.
... 생략
이제 바로 php 및 nginx 를 systemd 등록을 하고 실행을 해도 상관없지만 rh-php72-php-fpm 이란 이름은 너무 길어 외우기 힘듭니다. 편의를 위해 php-fpm 의 systemd 파일에 Alias 를 추가해 줄 것입니다.
vi /usr/lib/systemd/system/rh-php72-php-fpm.service
# It's not recommended to modify this file in-place, because it
# will be overwritten during upgrades.  If you want to customize,
# the best way is to use the "systemctl edit" command.

[Unit]
Description=The PHP FastCGI Process Manager
After=syslog.target network.target

[Service]
Type=notify
EnvironmentFile=/etc/opt/rh/rh-php72/sysconfig/php-fpm
ExecStart=/opt/rh/rh-php72/root/usr/sbin/php-fpm --nodaemonize
ExecReload=/bin/kill -USR2 $MAINPID
PrivateTmp=true

[Install]
WantedBy=multi-user.target
Alias = php-fpm.service
이제 systemd 파일을 enable 해주면 다음부터는 php-fpm 으로 실행시켜도 됩니다.
systemctl enable rh-php72-php-fpm.service
systemctl start php-fpm
정상적으로 실행이 되었다면 마지막으로 nginx 를 enable 해주고 실행합니다.
systemctl enable nginx
systemctl start nginx
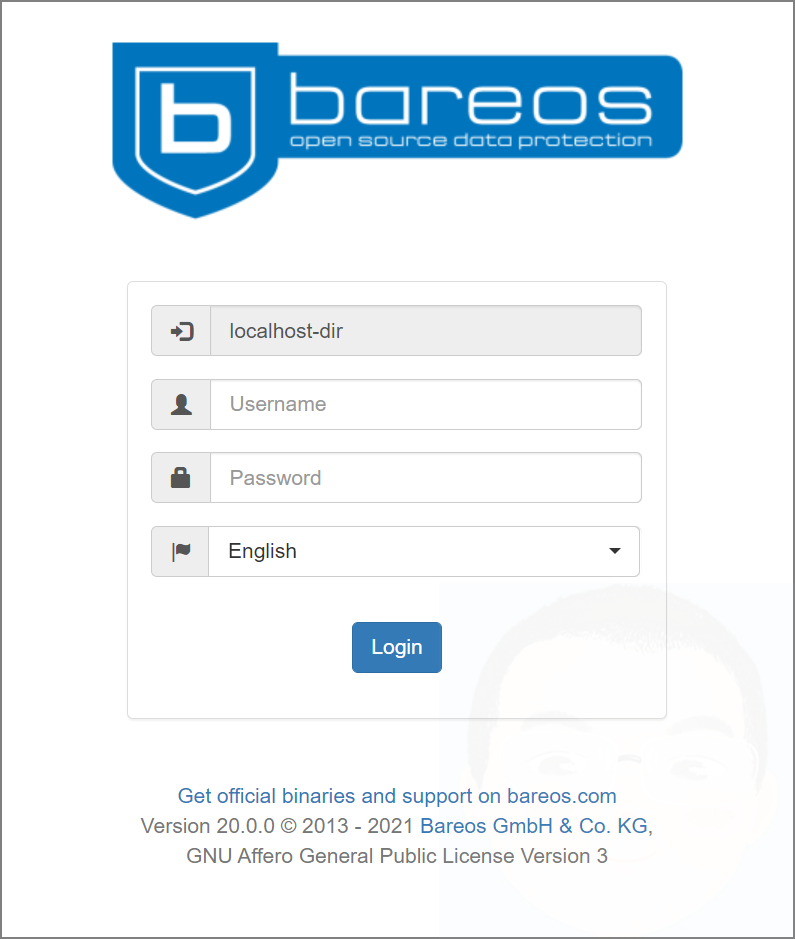
이제 웹 브라우저에 서버의 아이피를 입력하여 웹 페이지가 잘 뜨는지 보시고 로그인이 잘 되는지 확인하면 끝입니다.
http://server_ip
다음 포스팅에서는 본격적으로 Bareos 설정 방법에 대해 간략하게 알아보도록 하겠습니다.
추가: 다음 포스팅에서 추가하겠지만 미리 설명 드리자면 백업한 후에 WEB UI 의 Restore 탭에서 파일 리스트를 확인할 수 있는데, 20.0.0 버전에서는 파일 리스트가 보이지 않을 수 있습니다. 해당 이슈는 bconsole 상에서 .bvfs_update 명령어를 실행하면 해결 가능합니다.